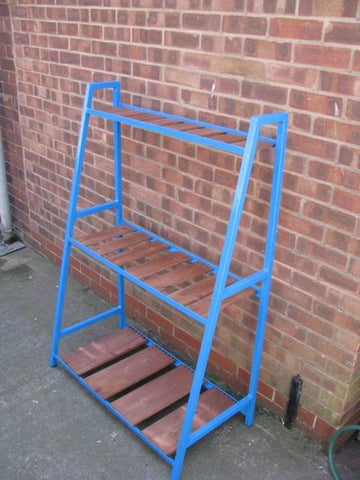
Plants add a lot of color and cheer to a home, but it can be tricky to find a place for them. There are only so many coffee tables you can squeeze into a living room. Besides, most plants need to soak up sun light in order to flourish, so they’ll all need to be concentrated by a window or sliding door. A plant stand is the best option for setting up your plants around the house.

While a plant stand from a store is quite expensive, a welder can create a great-looking plant stand with some square iron tubing and angle iron. One welder in the U.K. named Peter did just that, and he shared his plans in an online MIG welding forum. We’ll include some notes and additional explanations below based on his plans so that welders of all skill sets can take a crack at this great project:
What You Need for This MIG Welding Project
The plans for this unit will take 4 pieces of square tubing that are roughly 54” tall (the tubing for the front, angled leg will be slightly longer), cross pieces of square tubing for the legs that vary in length as needed (the top being 6” and the bottom 18”), and angle iron that is approximately 36” long for the selves. (though you can modify these measurements).
Welding Your Plant Stand
The shelf in this design has a leg that is angled at 45 degrees, and therefore, after prepping your metal, you’ll begin by cutting one edge of each of the two top cross pieces (these are the 6” ones) and one end of the two front legs at 45 degree angles. You’ll then attach the top cross pieces to the legs that will be straight vertical. Follow this by attaching the angled legs to the angled end of the cross piece.
You should end up with something like this:

After this you’ll add the four other cross pieces of square metal tubing to the legs. The bottom cross piece of square tubing will be 18”. Each straight leg should be attached to a corresponding angled leg so that each side has two legs, one angled and one straight, connected by three cross pieces.
Once the cross pieces are attached to the legs on each side, you’ll be ready to attach the angle iron to the legs. The angle iron will be where you place the shelves. The angle iron will be welded from one vertical leg to the other and from one angled leg to the other.
At this point you should have a shelf unit that looks like this:

As you work on each section, tack weld first and then finish weld once you’re sure that everything is square and lined up properly. You’ll have to cut or grind the bottom of the front legs, the ones that are at an angle, in order to make the shelf rest squarely on the ground.
Finishing Your Plant Stand
It’s all downhill from here. You’ll smooth off the welds as needed, prime the metal, and paint it whatever color you like. You can cut wooden shelves in whatever size or shape works best or look into custom cut glass shelves—a more expensive but excellent option for optimizing the amount of sunlight the plants on your stand receive.
If you end up using this design, be sure to stop by the welding forum to thank Peter for sharing his project.

