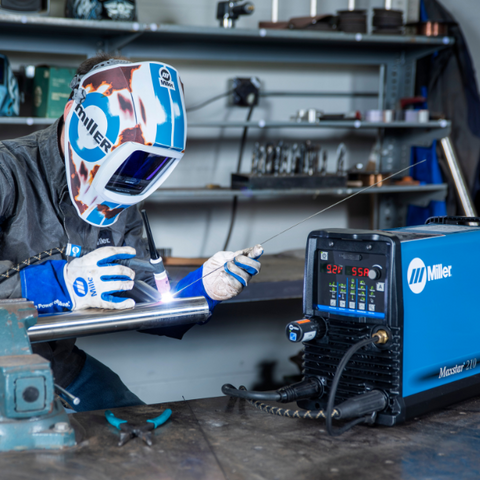
If you’re getting started with TIG welding as a hobby or as a potential new welding career that could pay off in the long run, it’s good to develop a clear plan for practicing your welding technique. TIG welding is specialized and has a narrow margin of error, so you can’t practice enough!
You could blow through a bunch of metal or leave a pile of cracked welds in your wake if you have tons of cash on hand. However, there are some simple and effective ways you can practice TIG welding effectively without spending your life savings on aluminum and steel practice pieces.
Practice Feeding the TIG Wire
Before you even start welding, learn how to feed the filler wire through your fingers with a TIG glove on. Get the feel of the glove and a clear idea of how fast or slow you can move the wire into the weld puddle before working on a metal piece.
You can also practice moving your foot on the TIG welder’s peddle to learn how to change the amperage of your welder while feeding wire. Getting a good feel for the wire will help you keep a good steady rate of filler metal into your weld and lets you focus on your technique.
Common TIG Welding Settings
When you begin practicing with your TIG welder, try lengthening and shortening the arc and shaping the electrode so that it’s either tapered or rounded so that you can see how your machine performs under a variety of conditions and positions. Review the best practices for the type of electrode you’re using, your power settings (AC or DC, etc.), and metal you’re working on. As you switch out metal with varying degrees of thickness, take note of particular settings that prove most useful.
Practicing TIG Welding Techniques
Besides modifying the materials used, the rate of your filler wire, and the amperage settings on your machine, you should also get a feel for the angle of your TIG torch and the impact that pulsing with a foot peddle can have on your weld puddle.
Most importantly, weld in a variety of positions and angles so that you get a sense of welding uphill, or horizontal. Weld lap joints and t-joints, and any other joint you can put together. It’s especially helpful to try out different rod sizes in each position so that you can easily select that best combination for your next project.
Just Keep Welding Beads
Of course all of this TIG welding practice can use up a lot of metal. Some experienced welders suggest that new TIG welders should just begin by making a series of beads, staking them up one after the other. That allows you to push, weave, and try out any other technique you’ve learned about.
Keep in mind that stacking beads like this can make the metal hot, so while it’s great to get a sense of what metal looks like when it gets too hot, you should also remember that the weld bead will react differently when the metal is already hot. Also some materials you can not tell if they are hot, for example aluminum shows no signs of heat. It may help to take a break every now and then just to give the work piece a chance to cool off.
Play with Your Shielding Gas Settings
Shielding gas is essential for a clean weld, but too much shielding gas will lead to a long, frustrating day. Learn to recognize when you have too much or too little shielding gas for your TIG welds.
Turbulation is caused by too much gas flow. Turbulation causes air to be pulled into the shielding gas cloud and contaminates the weld pool. The more important part is selecting a gas cup sized right for the job. The larger the gas cup the more flow required. Lastly if you are using a gas lens or diffuser will change the shape and density of the shielding gas cloud. A gas lens filters the gas so it is distributed more evenly over the weld pool. The traditional diffusers do not provide an even distribution and are more susceptible to turbulation.
Too little shielding gas is also obvious, generally leaving porosity or a black soot. Too little shielding gas may not be eliminated by solely increasing the flow rate. Tungsten extension is a vital source of proper shielding. You will need enough tungsten extension to see the weld and access the pieces being joined, but if the extension is too far it will have the same effect as setting the flow rate too low.
Prepare Your Electrode for the Job
Contrary to popular belief you can not use a pointed electrode, it will erode the tip and cause your arc to wonder. A flat must be put on the tip, the diameter of the flat depends on the amperage being used. The higher the amperage the larger the flat needs to be. Also the grind lines must be parallel to the length of the tungsten. If it is ground radially it will cause the arc to wander as well.
Never round the tip of the tungsten, grind lines attribute to a lot of arc wonder. Therefore if you use a rounded tip your arc will be erratic. Balling of the tungsten is also a thing of the past with new inverter technology and breakthrough of tungsten electrodes. If you are using an inverter for aluminum on AC try a ceriated tungsten at a balance around 65%. This balance takes some heat away from the tungsten and allows it to keep a more direct arc. You will notice a decrease in time to start the pool, this is due to he energy density increased by having a more directed arc. You can use that same ceriated tungsten on mild steel, stainless steel, titanium and other alloys using DC straight polarity.


